


Earlier this week, we introduced Trolley Sync’s new journal entry workflow capabilities. But how does it all work? In this guide, we’ll take you through the setup process for linking Trolley with your ERP for both workflows—bill payments and journal entries.
AP teams who integrate their ERP with their payout solution save hours of manual, duplicative work, while reducing errors across their systems and maintaining their data’s integrity.
Whether you create bills in your ERP or not, and whether you use Oracle NetSuite, QuickBooks Online, or Xero (with more integrations coming very soon!), Trolley Sync is here to streamline and automate your AP process. Here’s how to link your ERP with Trolley in just a few minutes.
What we cover
Step 1: Select your ERP
The first step in connecting Trolley to your accounting software is choosing your ERP. Simply sign in to your dashboard, click on Settings, then on Integrations, and you’ll see all of our available ERP integrations.
If you don’t have a subscription to Trolley Sync, you’ll see an orange bar at the top of your screen with a button to Subscribe. Users on our Standard plan have access to a 30-day free trial. If you’re looking to upgrade to our Plus plan, contact our sales team.
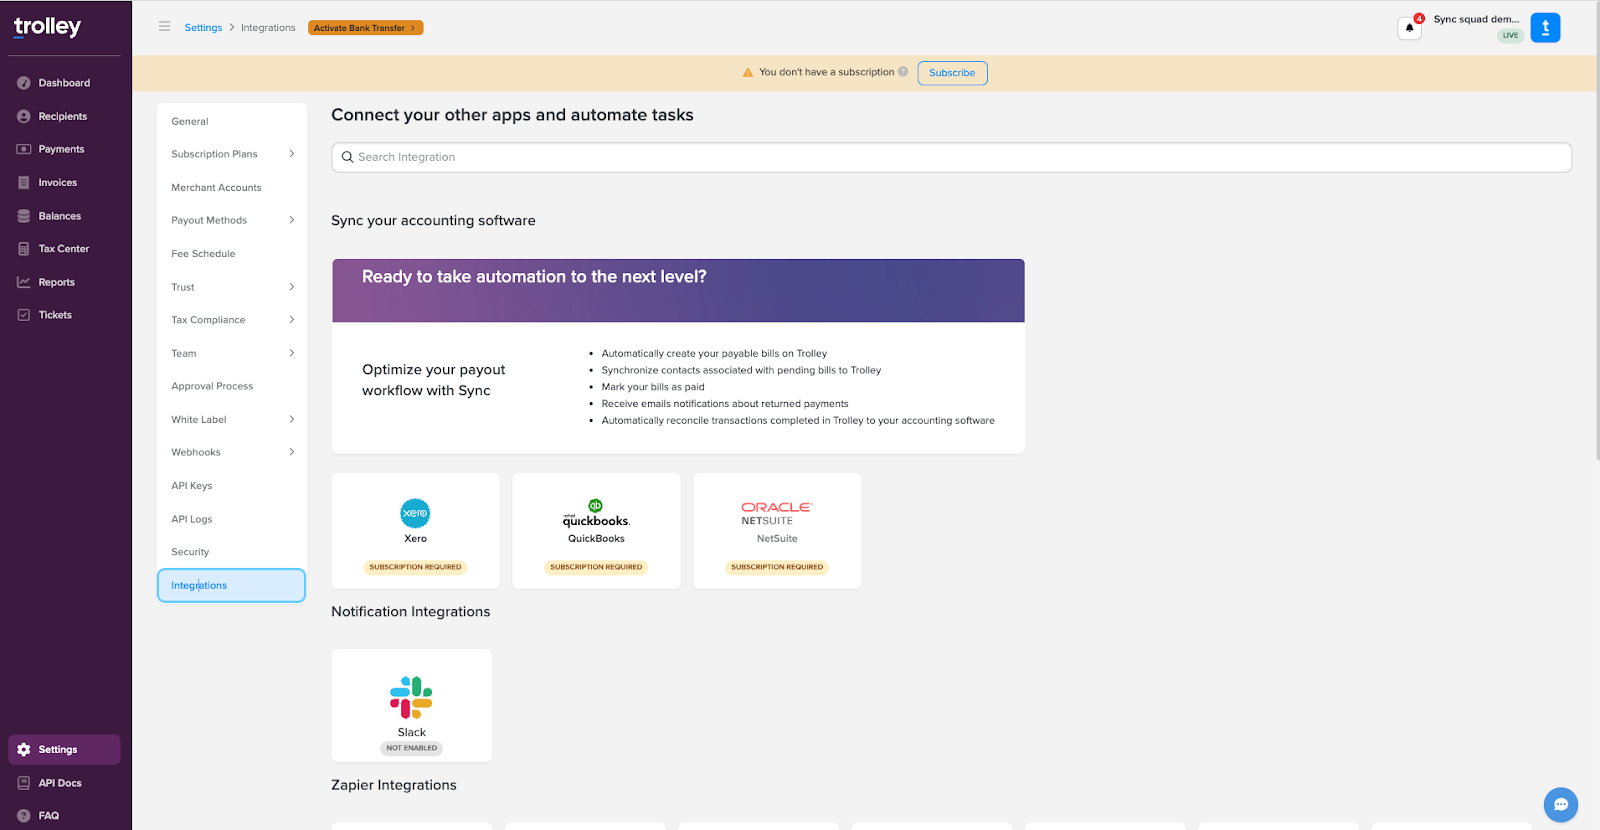
In this example, we’ll walk through an Oracle NetSuite integration because it involves a couple of extra steps. QuickBooks Online and Xero users will skip step 3.
Click on Connect Accounting Software to continue the setup process.

Now it’s time to authorize Trolley—simply click Next after ensuring that the correct accounting software is selected.

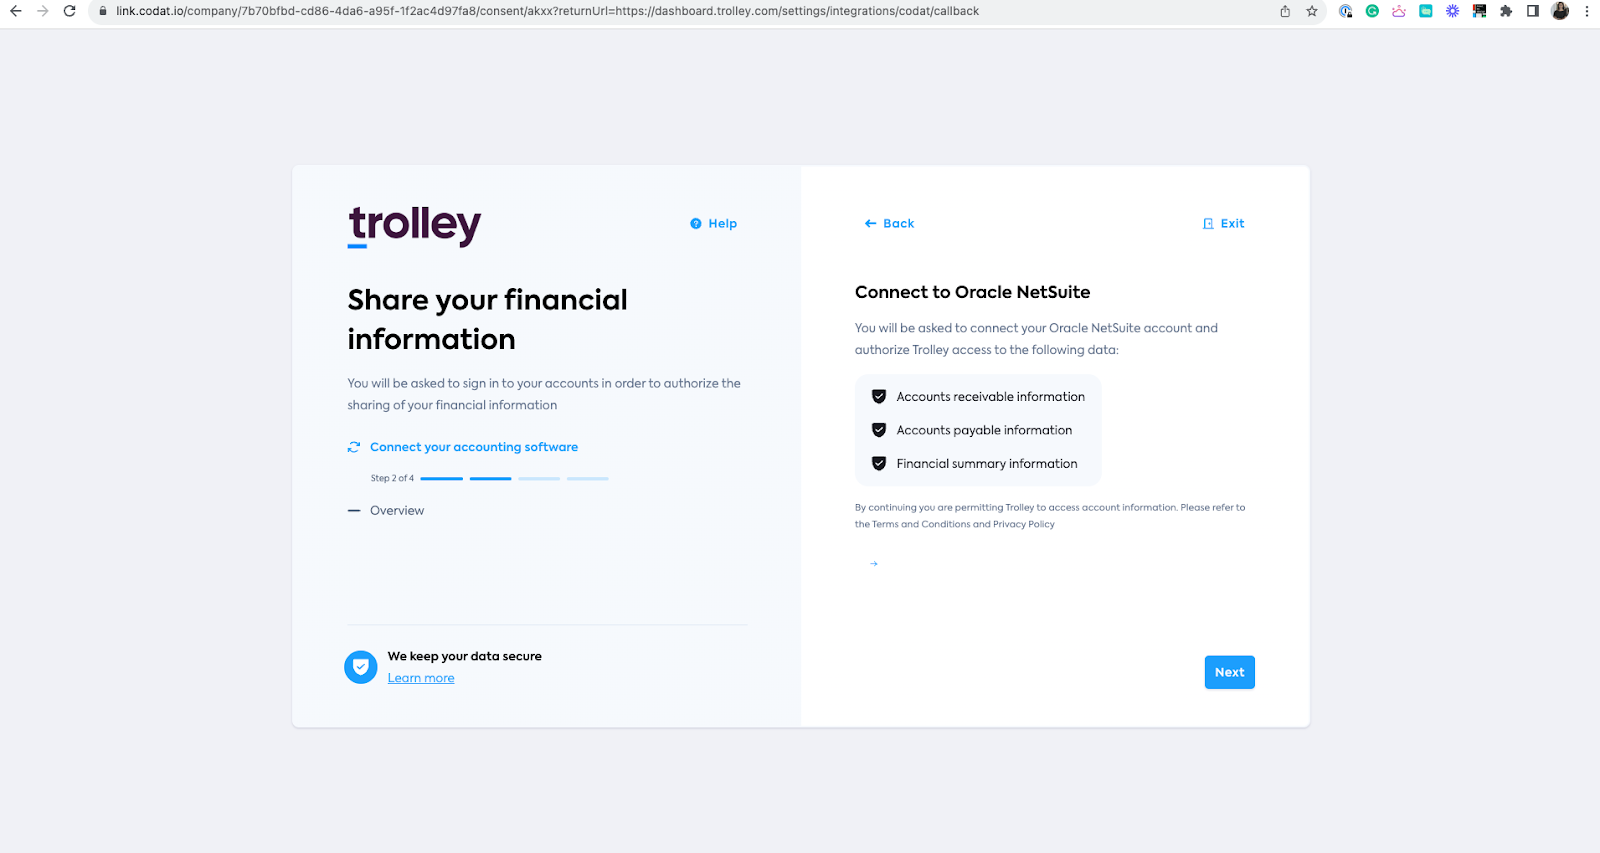
Step 2: Authorize sharing of financial information
Here’s where you’ll authorize the sharing of some of your financial information with Trolley. This includes accounts receivable, accounts payable, and financial summary information, but only that which is necessary to make payouts to your recipients. We don’t read, save, or search your financial data.
Trolley only accesses information in the instance that you share with us. If you have multiple instances in your ERP, we won’t see any financial information in any of the other instances.
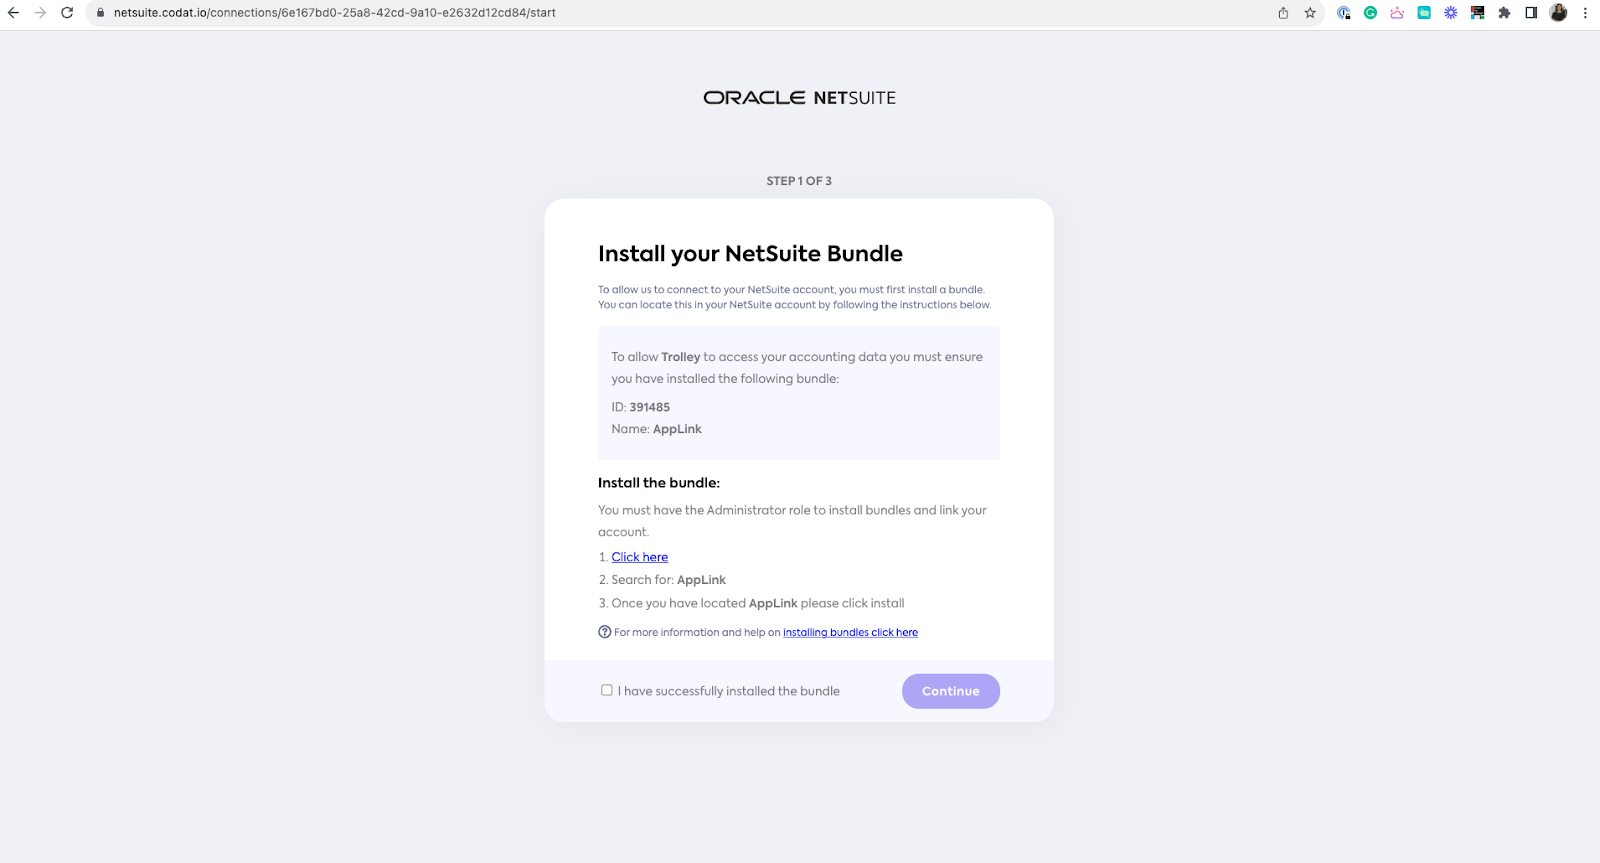
Step 3 (NetSuite users only): Install the NetSuite bundle + SuiteCloud features
NetSuite users will need to install an AppLink bundle from their NetSuite account to be able to connect with Trolley. Teams using other ERPs will skip this step.
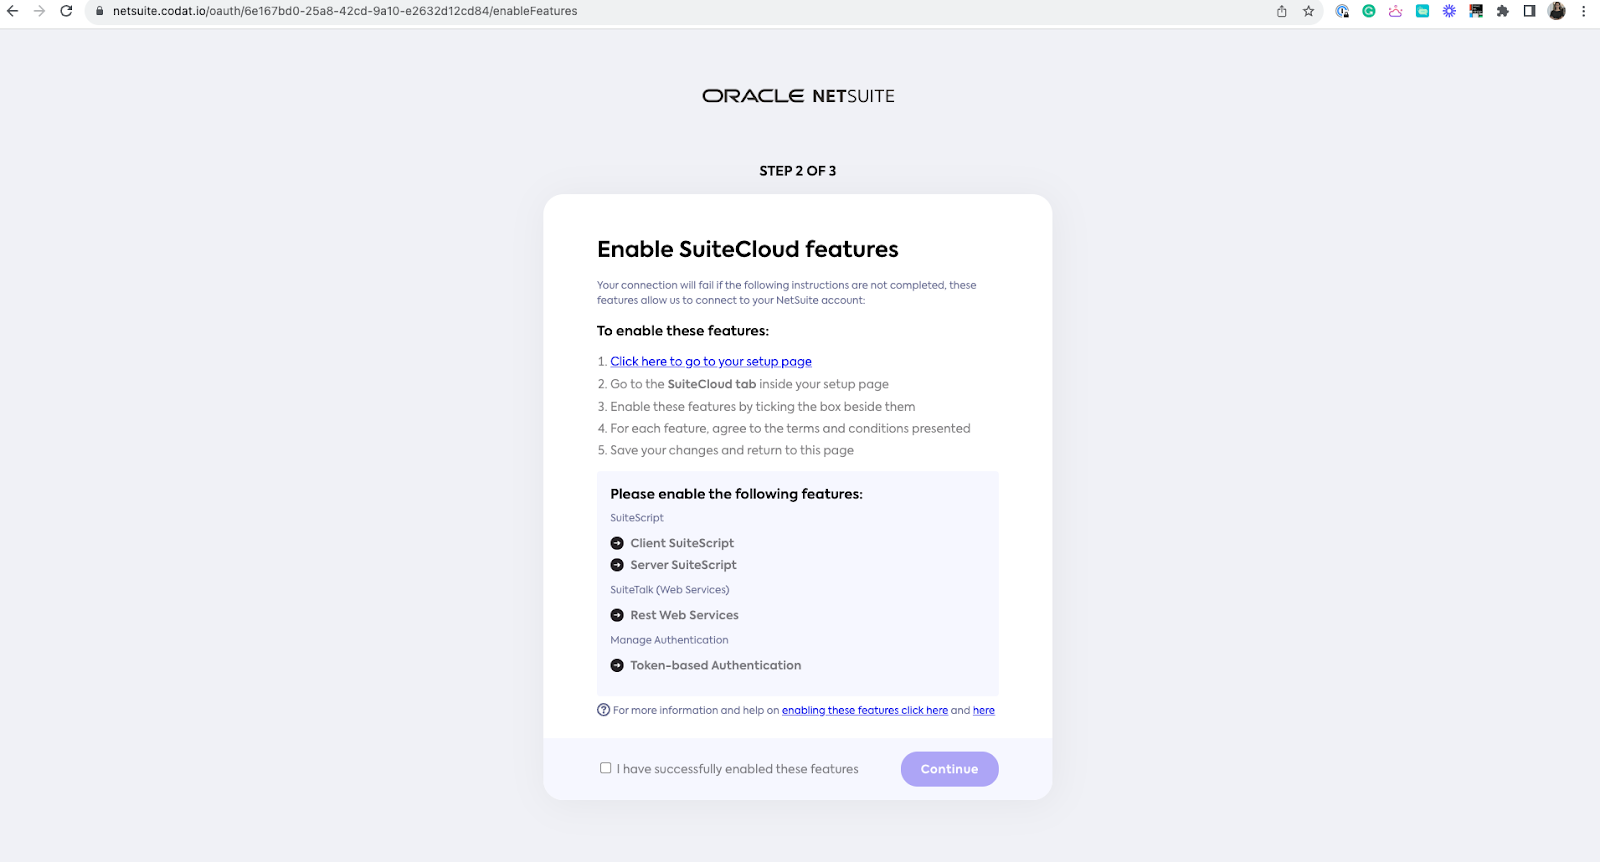
NetSuite users will also need to enable SuiteCloud features. There are many user roles available in NetSuite, so you’ll need to make sure that you have the permissions to do this.
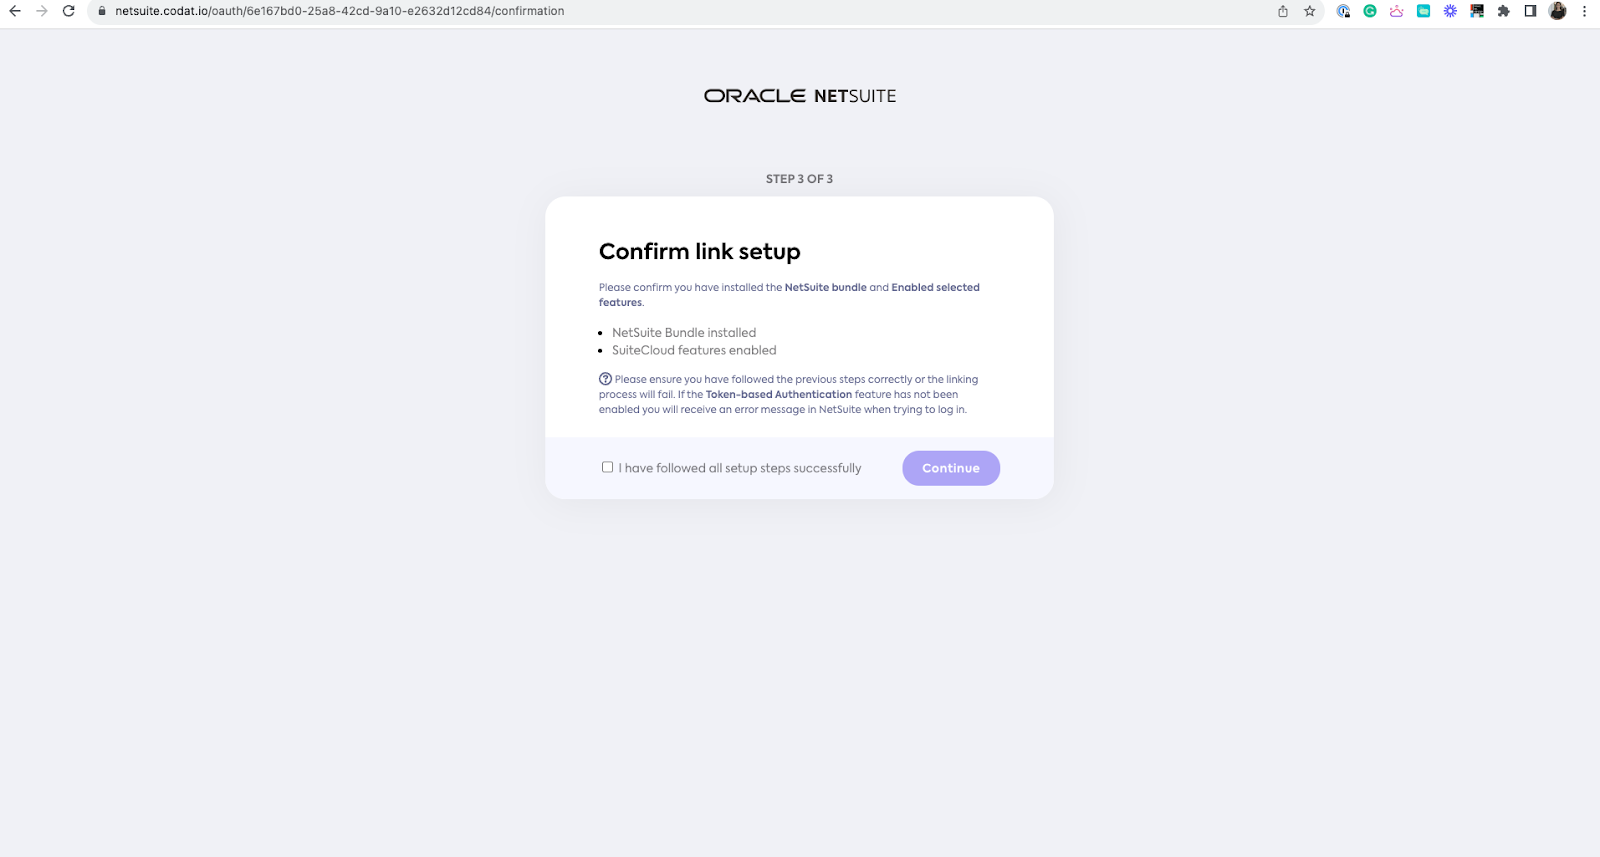
Then, you’ll need to confirm that you’ve installed the bundle and enabled SuiteCloud features.
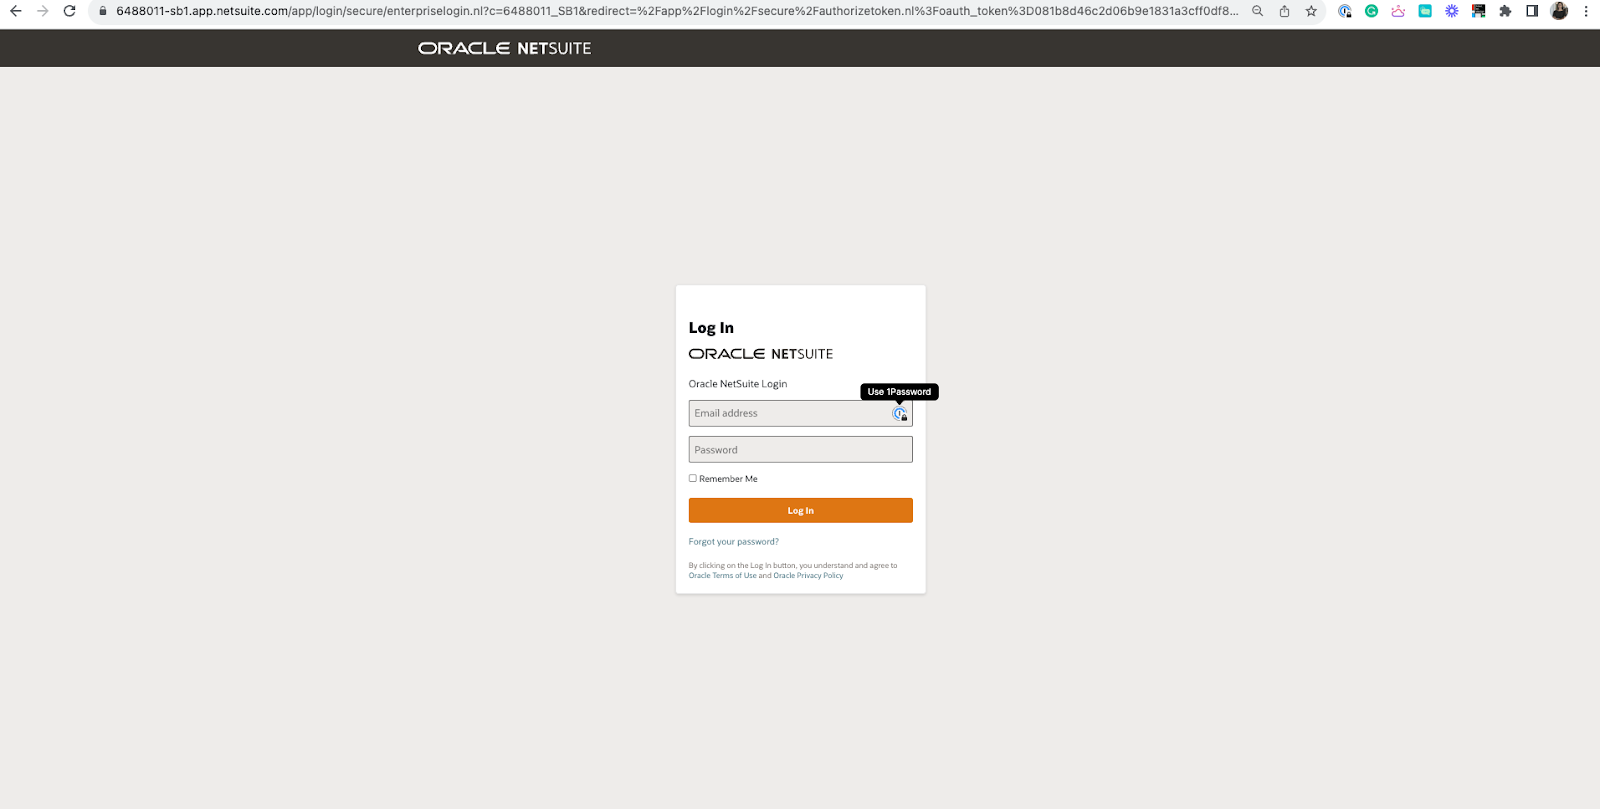
Step 4: Log in to your ERP account
Once you’ve confirmed this, you’ll log in to your ERP account. From here onwards, all the steps are the same, regardless of which ERP you’re using.
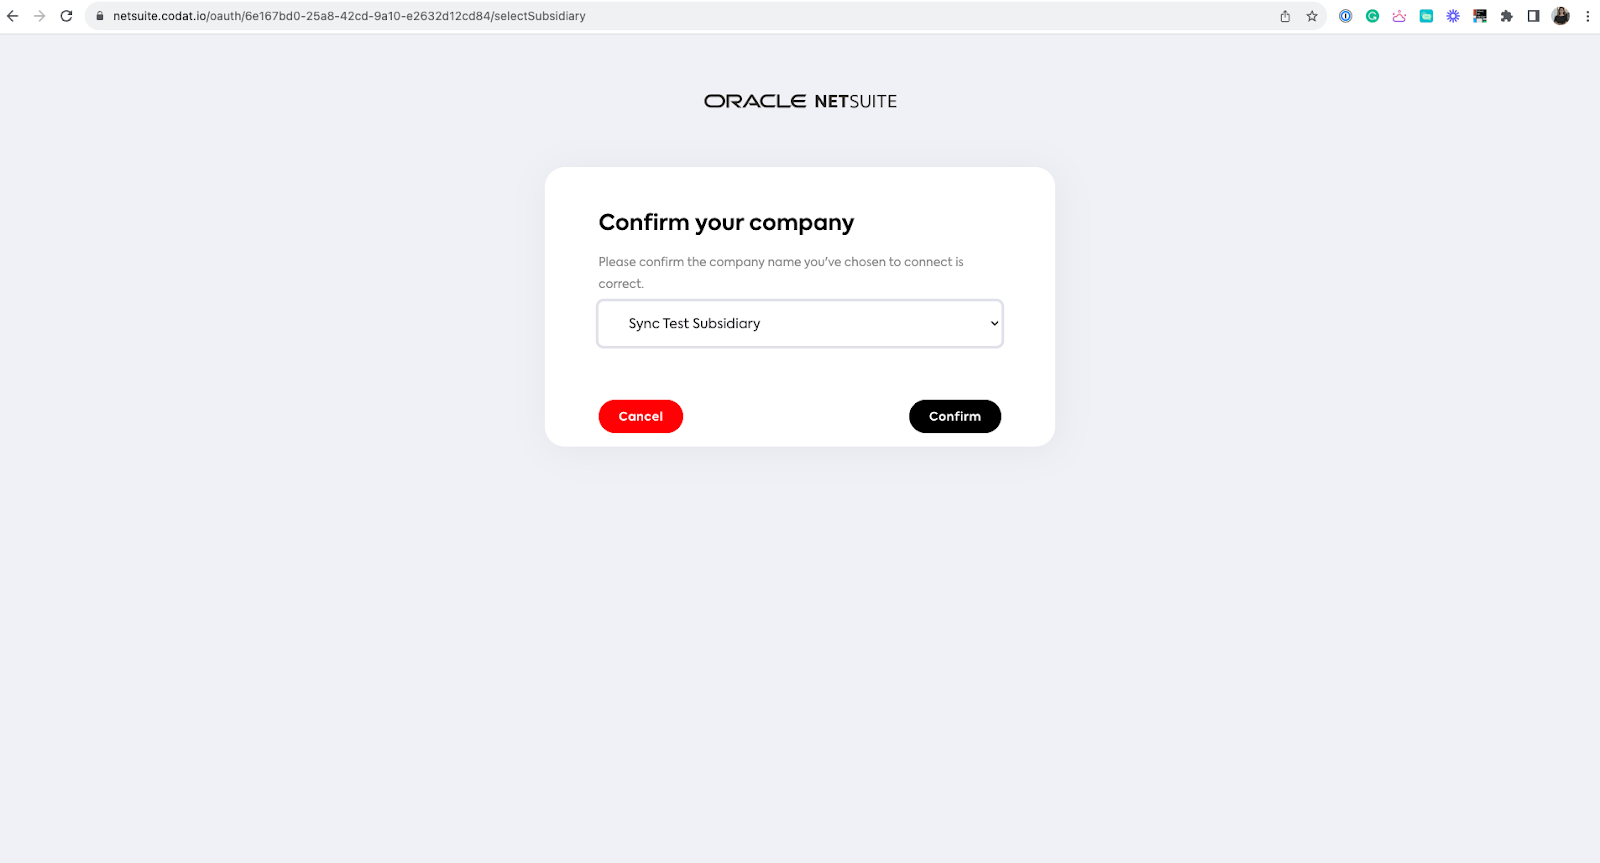
Step 5: Select the instance to link
Once you’ve selected, authorized, and logged in to your accounting software, you’ll move to the next stage of the setup—choosing which instance to connect with Trolley. If you have multiple instances in your ERP, Trolley only gets access to the instance you share with us.
Note that Trolley can only be connected to one instance, in one accounting software.
Success! Your ERP is now connected with Trolley. Now you’re ready to choose your workflow.
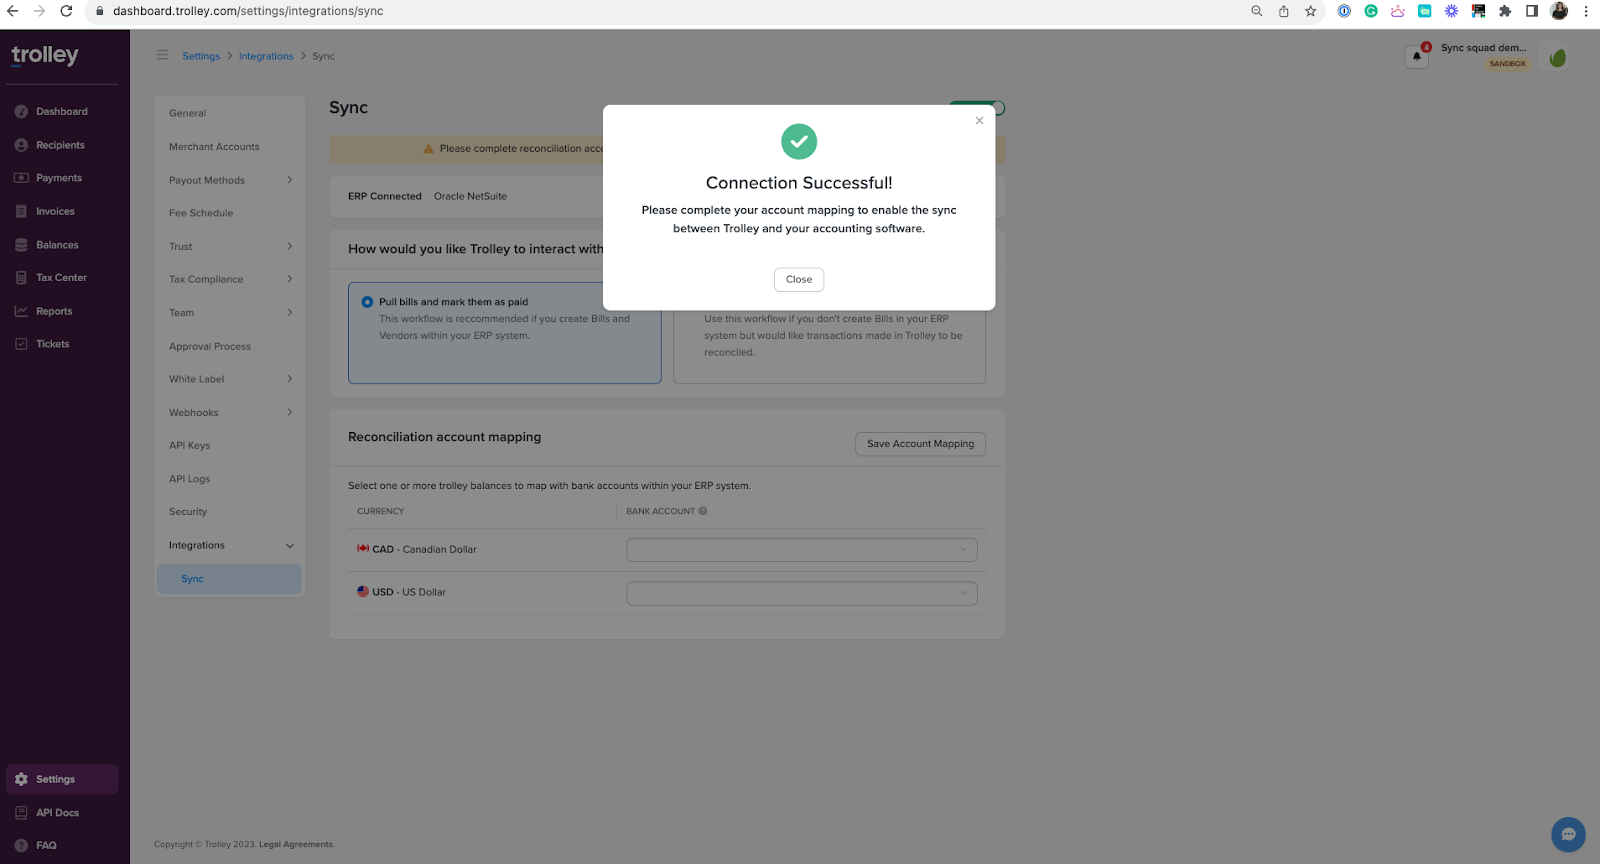
Step 6: Choose the appropriate workflow
Before we continue, let’s quickly recap the two workflows Sync supports:
- Bill payments:
- If you want to work in your ERP, the bill payments flow lets you create new bills to pay in your ERP or accounting software, which are then recognized by Sync, and those bills and the associated vendors are auto-created in Trolley. Then, once the payments are made, the bills are automatically marked as paid in your ERP.
- Journal entries:
- If you want to work within another system or directly in Trolley, the journal entries flow lets you make payments in Trolley, then automatically pushes those transactions to your ERP system as both general ledger items and journal entries once the payments are successful.
When you select a workflow, you’re not locked in forever—you can switch between them as needed.
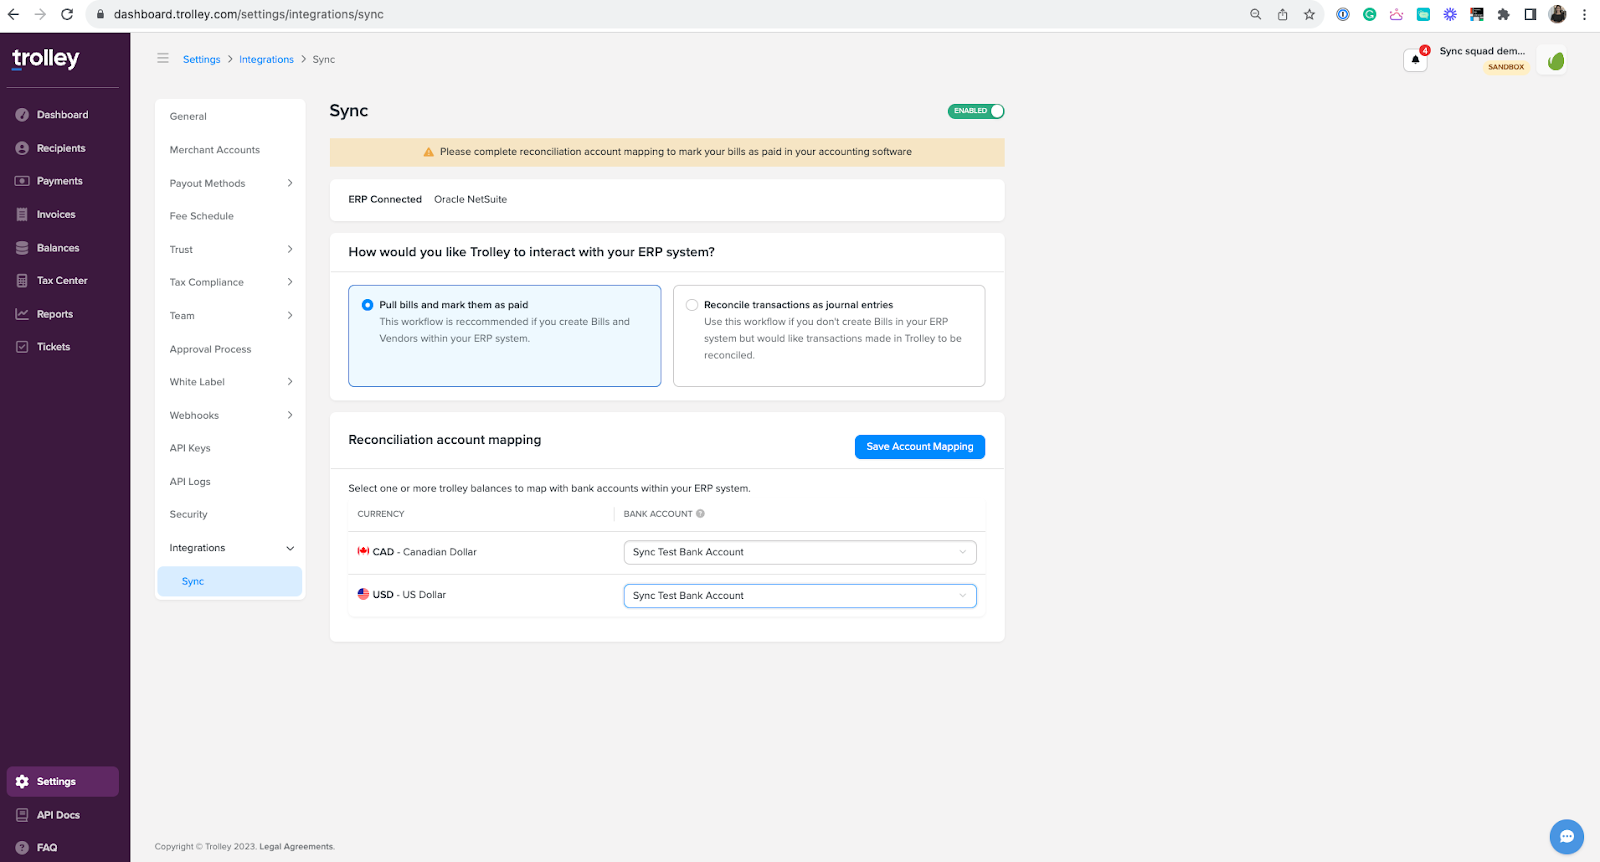
For the bill payments workflow, every Trolley balance will have to be mapped to a bank account within your ERP system. You’ll select which bank account(s) to map to here.
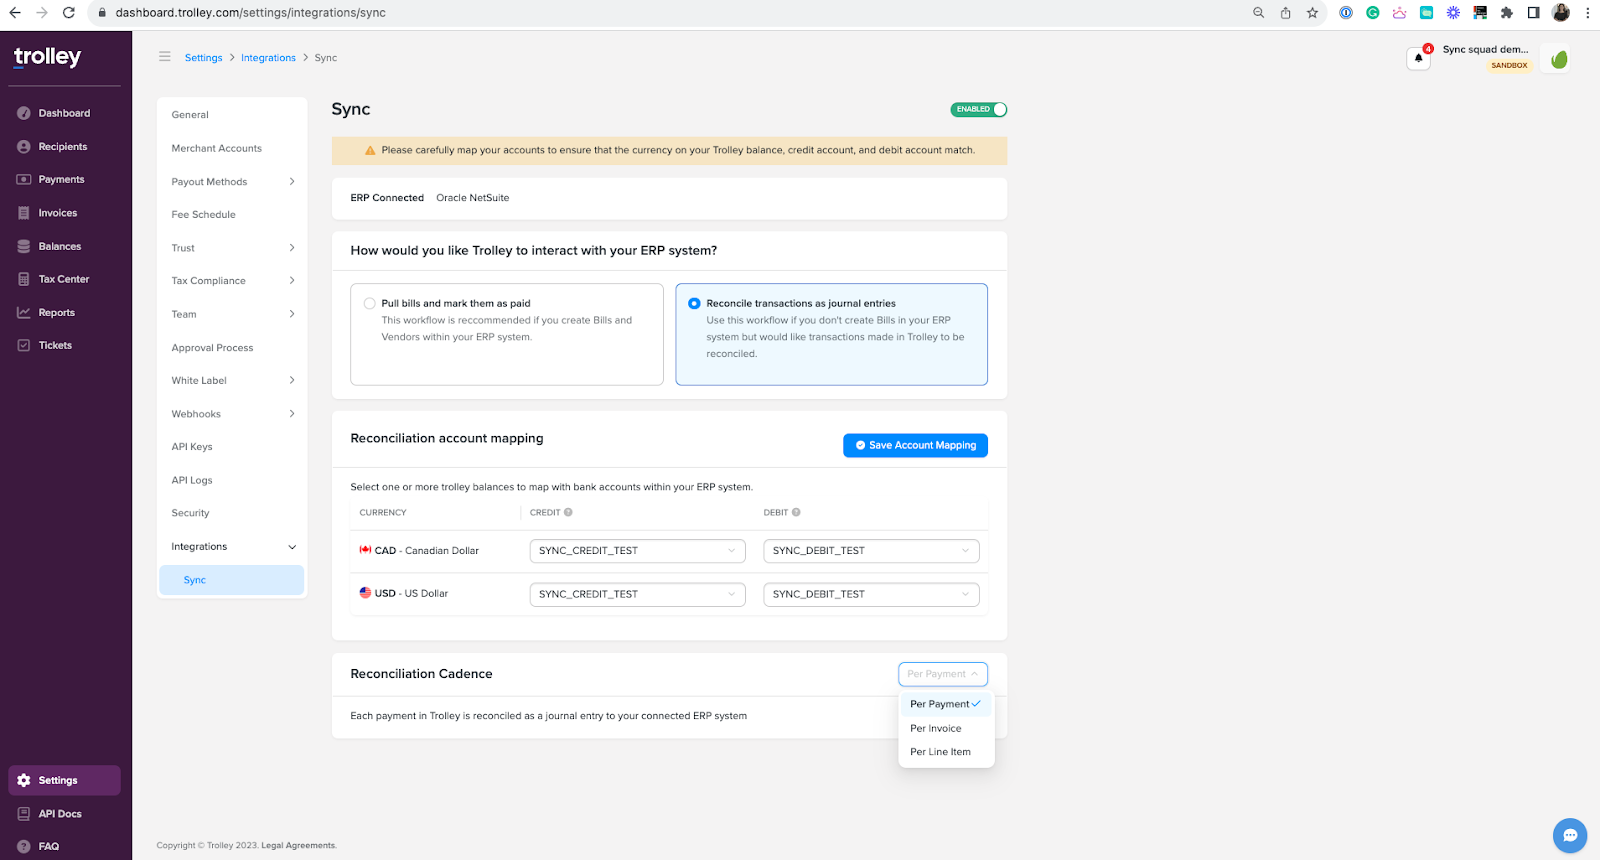
Journal entry workflow users will map credit and debit accounts for every Trolley balance. Once you’re done, click Save Account Mapping.
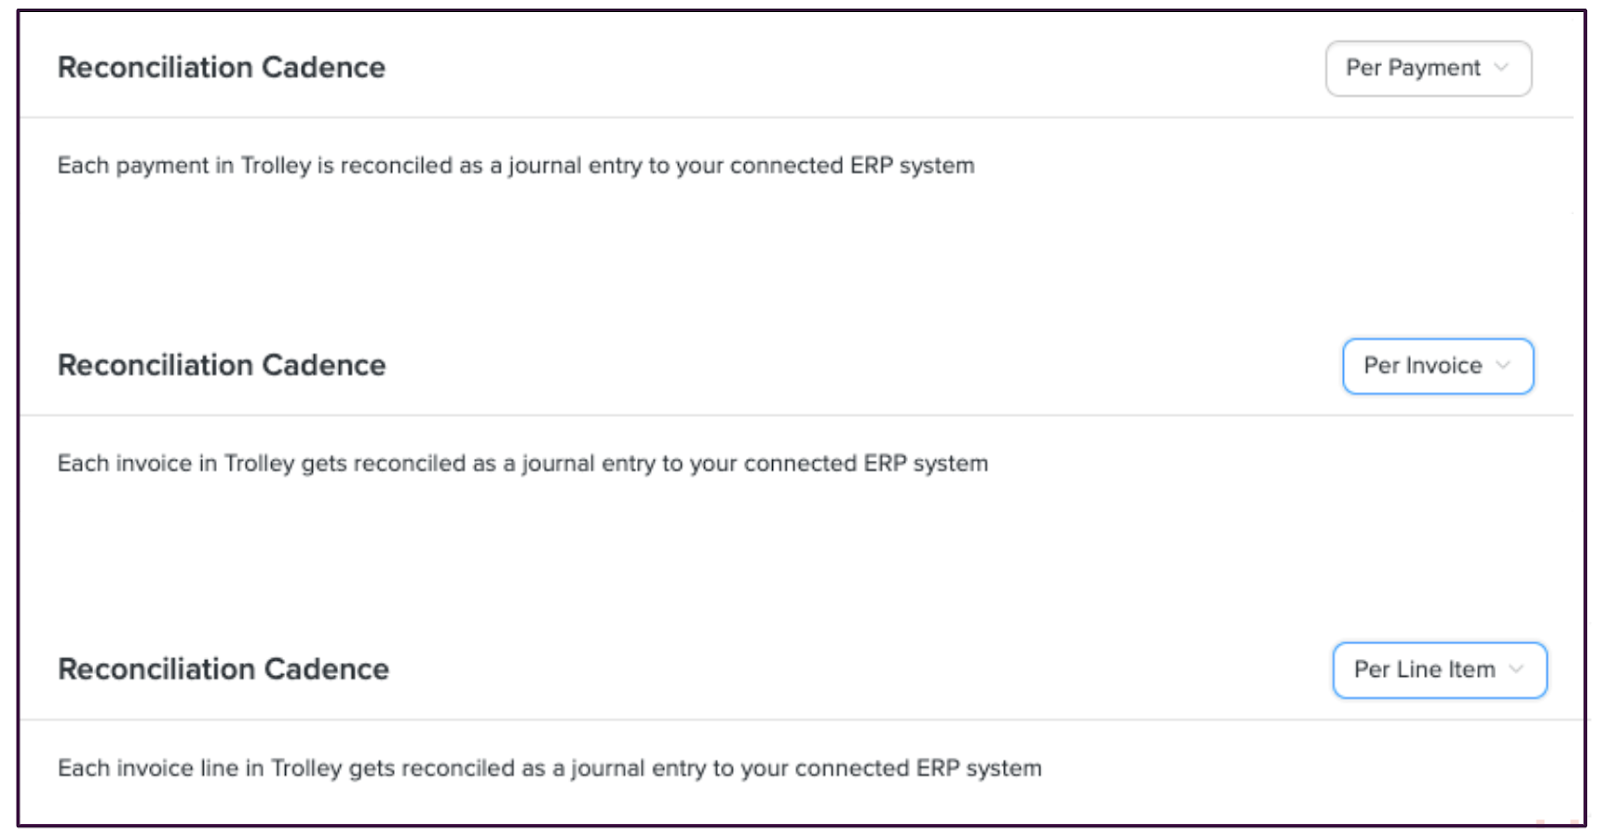
Trolley Sync features invoice merging capabilities that can be enabled or disabled in the settings. This is a great way to reduce transaction fee costs while maintaining your bookkeeping.
Say a recipient has 10 unpaid bills. With Trolley invoices, all 10 bills are merged into a single invoice so you don’t incur the transaction fee ten times—you pay it just once.
But doesn’t this disturb the flow of your ERP reconciliation? Not at all.
The way that these invoices show up in your ERP is up to you. Whether you want them reconciled on a payment level, per invoice, or per invoice line level, the customizable settings are here to make the processes work for you.
This is where you’ll select how you want the reconciliation to work in your ERP system. You can change these and all the account mapping settings at any time.
That’s it! Enjoy the seamless flow of data between Trolley and your ERP, and hours of manual work saved. 🤝
Want to learn more about Trolley Sync or our other Zapier-powered app integrations? Check out our Sync FAQs, book a demo, or contact a member of our team today.
We also have guided walkthroughs for all of our ERP integrations, as well as Sync FAQs, on our help center.