


Have you ever tried to collect payment or bank details from a payee or supplier who can’t log into your platform—or perhaps your website or app doesn’t even have an account login option?
Collecting bank, tax, or identity information shouldn’t feel like chasing paperwork for hours. Emails get lost, spreadsheets get messy, and tax forms pile up in inboxes.
That’s where Trolley’s recipient portal comes in: a hosted, white‑label webpage where your recipients can securely provide payout details, tax forms, and KYC data—without you writing a single line of code. And yes, it’s included in your Trolley account at no additional cost.
Note: If your website or app allows users to log in and you have some engineering resources available, the recipient widget may be a better fit. With just a few lines of code, you can embed a secure, fully responsive widget (via iframe) directly into your website or mobile app. Unsure which is the best fit? Reach out anytime and we’ll help you choose the right solution.
When to use the recipient portal
The recipient portal is ideal for your business if:
- You need to pay recipients but don’t have a secure way to collect and store their details.
- You want a no‑code setup with zero engineering effort.
- Your platform doesn’t allow recipients to create accounts or save payout/tax/verification details.
- You’d like to send recipients to a secure URL during onboarding to capture payout methods, tax forms, and identity verification.
- You want to automate outreach—emails are sent automatically to request missing details, without any manual effort.
- You want everything branded under your company name, reinforcing trust throughout the onboarding experience.

How it works
Setting up the portal takes just a few minutes inside the Trolley Dashboard. All white‑label features can be found under Settings → White Label.
1. Brand your portal
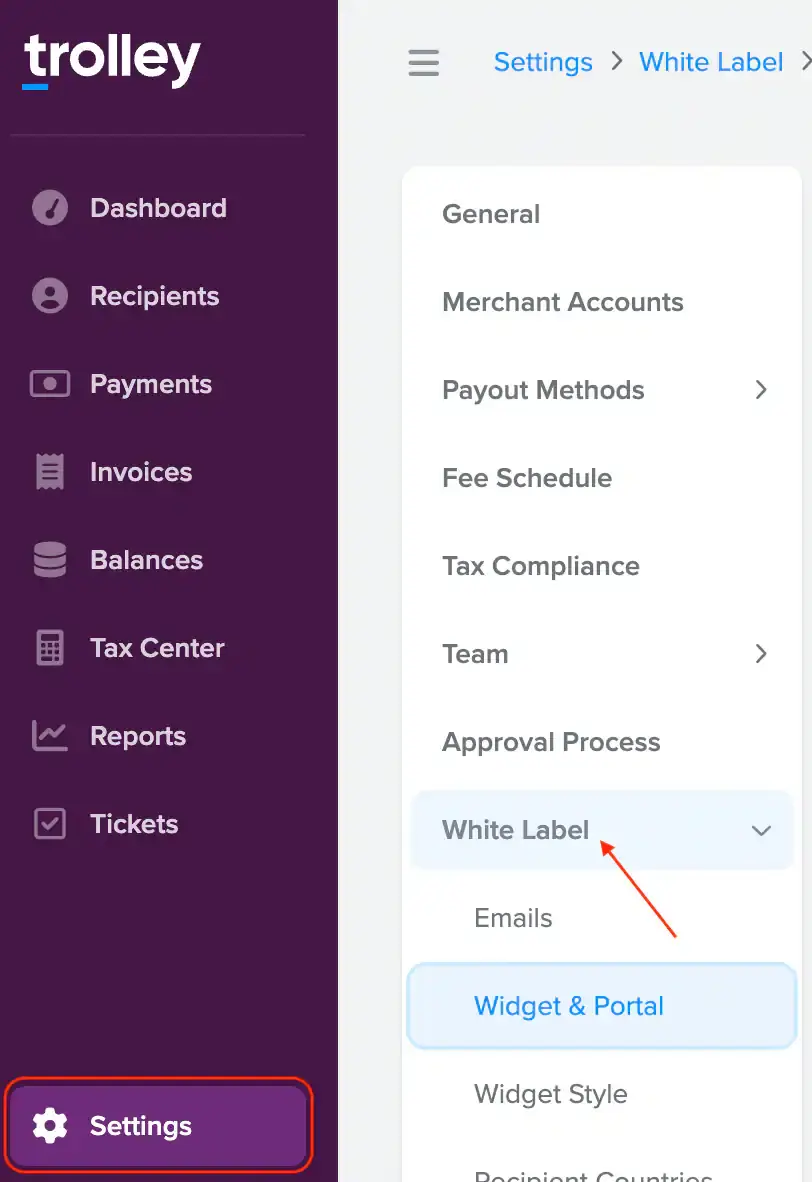
To get started, go to Settings → White Label and set up your branding. Upload your logo, set your brand color, and add support/business details. Your portal will look and feel like an extension of your brand.

2. Enable white‑label emails
In Settings → White Label → Emails, enable emails like “Request payout method details from incomplete recipients.” For a more detailed setup guide, read our help center article on how to set up white-label emails.
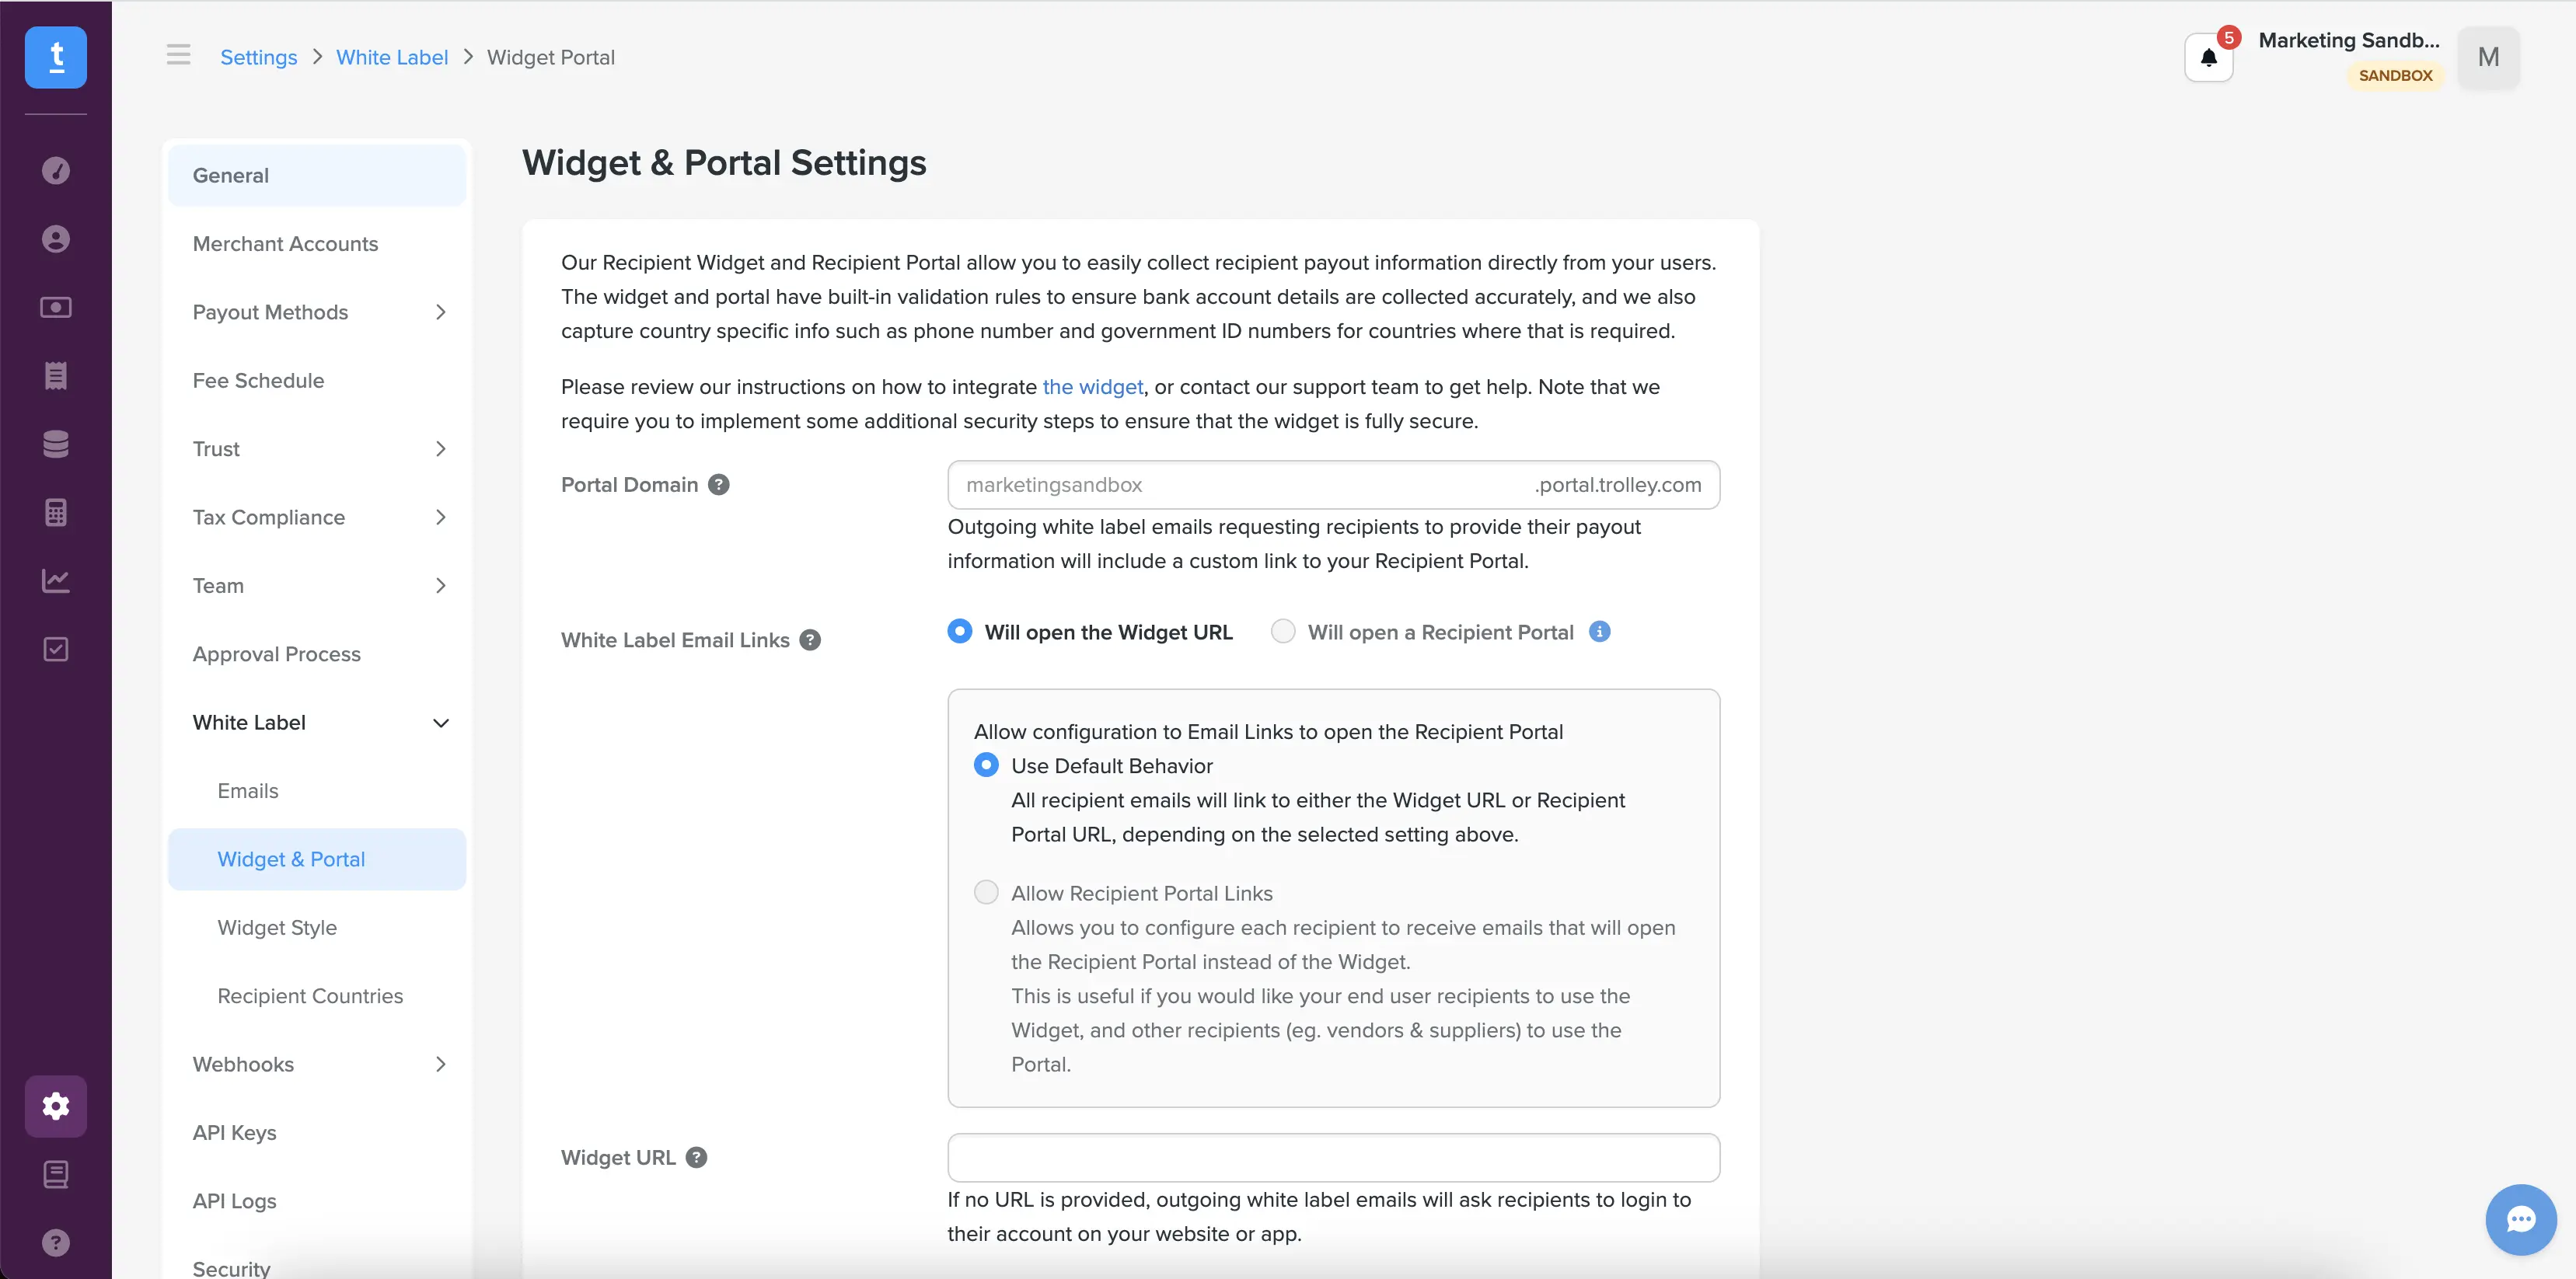
3. Set up your portal
Head to Settings → White Label → Widget & Portal. Enable the portal, create a subdomain (your business name usually works best), and customize the experience by selecting your language and choosing which features to include, such as payout method collection, payment history, verification history, and US tax collection.
4. Add and invite recipients
From the Recipients tab, click + Create Recipient. You can either add recipients manually or upload a CSV file to import a batch. A template and sample are provided to make the process simple. Once added, recipients will automatically receive an email prompting them to log in and complete their account setup.
Pro tip: Try it yourself first—add your own email to experience the flow from a recipient’s perspective.
That’s it! You’re now all set to onboard recipients.